Customising the terminal in Mac OS X

The first thing I do when I get a new workstation is setup my terminal so that I don't need to squint into the void trying to read things. I add some colour, remove the icky bold fonting on the file path and rearrange the prompt to be a little nicer.
In this post I'm going to cover how you can replicate my terminal changes and it will be step-by-step for those that only want specific changes!
Note: You will need to restart your terminal to see the changes you make. You can follow everything here and then restart at the end or you can restart after each change to see the effects!
Editing the bash profile
The changes we will be making are all to the bash profile which can be opened via the command sudo nano ~/.bash_profile. This will open the profile with the nano editor, you can substitute nano for whichever commandline editor you wish!
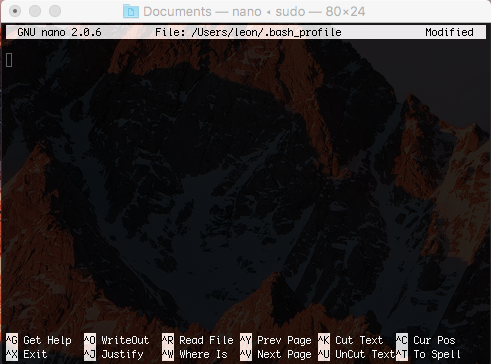
To exit you can use the command ctrl + x, then enter y/n to save or not save your changes to the file.
Enable colours
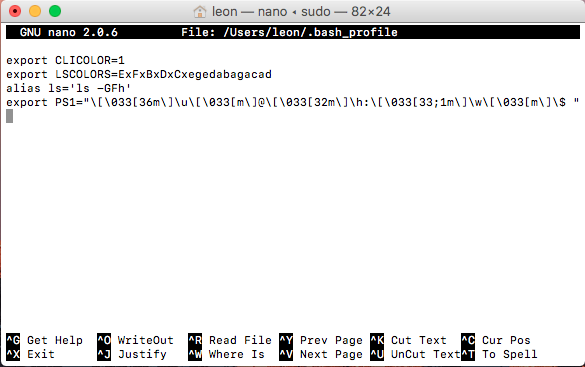
We will be updating our bash profile to add colour to our prompt, we will be adding the lines export CLICOLOR=1 & export LSCOLORS=ExFxBxDxCxegedabagacad.
These two lines enable commandline colours and define the colours for the ls command. You can replace the value of LSCOLORS with your own scheme, using this nifty tool.
Then we add the line alias ls='ls -GFh'. This line means that whenever we run the ls command, it actually runs ls -GFh. The G flag adds the colour to the output, the F flag adds a trailing / after a directory, * after an executable and an @ after symlinks which makes it easier to identify file types at a glance. Finally the h flag resizes the whole thing to make it human readable!
Updating the bash prompt
To update the bash prompt to read username@hostname:cwd $ we will add the following line to our bash profile:
export PS1="\[\033[36m\]\u\[\033[m\]@\[\033[32m\]\h:\[\033[33;1m\]\w\[\033[m\]\$ "

What should my bash_profile look like now?
After enabling colours and updating your bash prompt your .bash_profile file should look like this:
Terminal preferences
In my terminal I have made two preference changes. The first of which is that I changed the profile to Pro, the second is removing the bold font from the bash prompt.
Changing profile
To change the profile you must open preferences (cmd + , is the shortcut when a terminal is in focus), navigating to the Profiles tab, select the Pro theme and then press default at the bottom of the sidepane.
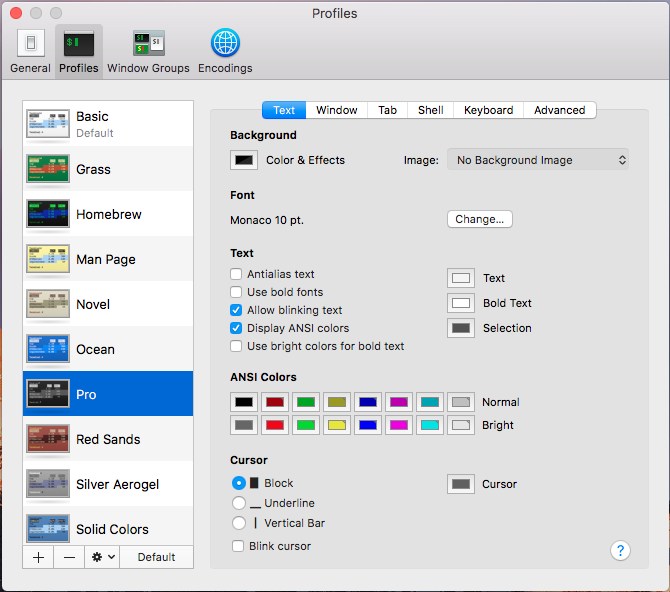
I also set this to the default for new windows. You can do this by navigating to the General tab and selecting the option On startup, open:, then selecting the Pro profile. I then do the same for new windows and new tabs.
Removing the bold font from bash prompt
If you're wondering why my terminal has looked a little different still, it's because I have already turned off bold fonts!
To remove the bold font from your bash prompt you must open preferences and navigate to the Profiles tab, then select the 'text' tab. Then you must navigate to the 'text' subheading and unselect the Use bold fonts option.
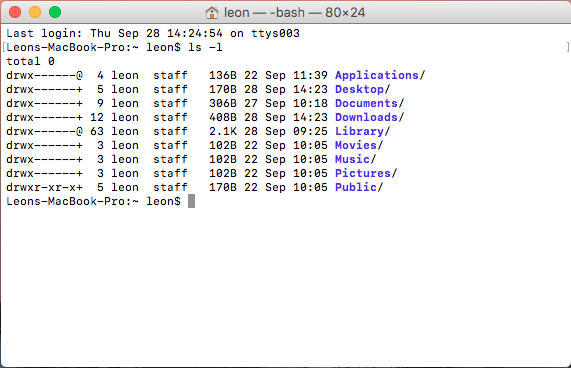
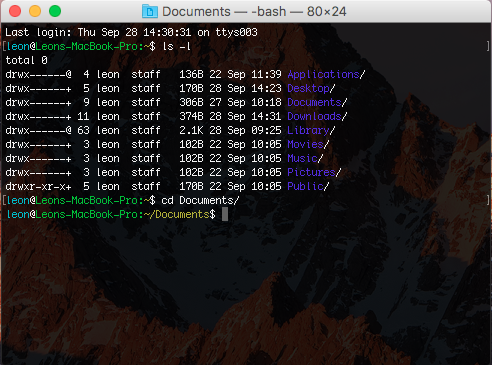
What should it look like now
If you've done everything in this post, your terminal should now look like this:
Leave a comment!
Leave a comment describing how these changes have affected your workflow, any additional changes you've made or would like to make!