Let's Encrypt! - Free SSL/TLS certificates

Let's Encrpyt is a free, automated and open certificate authority by the Internet Security Research Group (ISRG)!
This will be a long tutorial, so I'll break it into two parts and this post will cover obtaining your certificate. Installing your certificate will be out later on! I hope this is a helpful post.
I'm going to run you through how to install Let's Encrypt, obtain and configure SSL/TLS (on Nginx). I'll also go through how to set up a cronjob that will automatically renew your certificate, they only last 90 days!
Before starting, this tutorial was created for Ubuntu v14.04, with a non-root user that has sudo privileges. You also need an A record that points your domain to your webserver's ip address, as well as having both example.com and www.example.com as domain names.
Finally you need GitHub installed to clone the repository.
Installing Prerequisites
First you need to update your package manager. Then you need to install Git and bc, then clone the Let's Encrypt repository here:
 sudo apt-get update
 sudo apt-get -y install git bc
 sudo git clone https://github.com/letsencrypt/letsencrypt /opt/letsencrypt
You should now have a copy of Let's Encrypt in the /opt/letsencrypt directory.
Obtaining a Certificate
We're going to use the Webroot plugin to obtain our SSL certificate, you can use various other plugins (eg. Apache) but they will only obtain the certificate. You will still need to manually install them.
The Webroot plugin works by placing a file in the /.well-known directory within your document root, which will then be opened through your webserver by Let's Encrypt for validation. Depending on your set up you may need to explicitly allow access to the directory.
If Nginx is not installed, you must install it. You can use the below command:
sudo apt-get install nginx
To make sure that the directory is accessible to Let's Encrypt, we'll make a quick edit to our Nginx setup. The below command uses the default location, you may need to amend it.
sudo nano /etc/nginx/sites-available/default
Inside of the server block, you must add the location:
location ~ /.well-known {
    allow all;
}
You will also want to look up your document root, by searching for the root directive. This path is required for the Webroot plugin. The default location for this is /usr/share/nginx/html.
Now you can save and exit, then reload nginx to get your updated config in action.
sudo service nginx reload
Now we want to use Webroot to request our SSL certificate. We are specifying our domain names with -d, you can use one certificate for multiple domains so include all the domains you want!
cd /opt/letsencrypt
./letsencrypt-auto certonly -a webroot --webroot-path=/usr/share/nginx/html -d example.com -d www.example.com
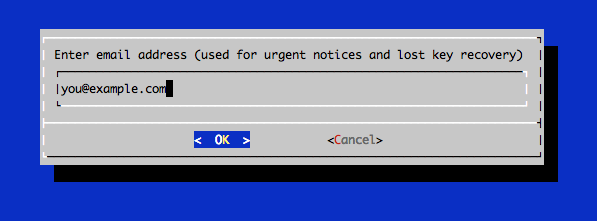
After Let's Encrypt initialises you will be prompted for some info, at the prompt enter your email for renewal notices and lost key recovery:
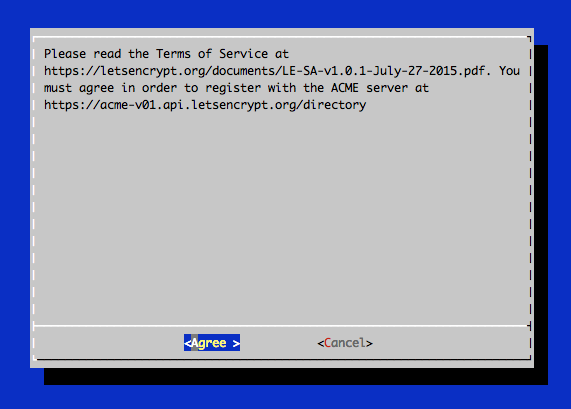
Then you must accept the user agreement:
After this you'll get a big block of text that looks something like this:
IMPORTANT NOTES:
- If you lose your account credentials, you can recover through e-mails sent to email@example.com
- Congratulations! Your certificate and chain have been saved at /etc/letsencrypt/live/example.com/fullchain.pem. Your cert will expire on 2016-03-15. To obtain a new version of the certificate in the future, simply run Let's Encrypt again.
- Your account credentials have been saved in your Let's Encrypt configuration directory at /etc/letsencrypt. You should make a secure backup of this folder now. This configuration directory will also contain certificates and private keys obtained by Let's Encrypt so making regular backups of this folder is ideal.
Take note of your email, path and expiry date. They can be found in the first and second bullet points. A common error to get here is Failed to connect to host for DVSNI challenge, this means that you may need to reconfigure your webserver's firewall to allow TCP traffic on port 80 & 443.
Certificate Files
You should now have the following PEM-encoded files:
- cert.pem: Your domain's certificate
- chain.pem: The Let's Encrypt chain certificate
- fullchain.pem:
cert.pemandchain.pemcombined - privkey.pem: Your certificate's private key
It's very important that you know where these certificate files are kept because you will need to reference them in your webserver configuration!
The files are placed in a subdirectory: /etc/letsencrypt/archive. However Let's Encrypt creates symbolic links to the most recent certificate files in the /etc/letsencrypt/live/example.com directory. Because these links will always point to the most recent certificate files, this is the path that you should use to refer to your certificate files.
You can check that the files exist by running this command (using your domain name!):
sudo ls -l /etc/letsencrpyt/live/example.com
The output from this command should be the above list of your certificate files.
Extra Security
To bolster your security, you can generate a strong Diffie-Hellman group (read up on what exactly a DH group is here!) using this command:
sudo openssl dhparam -out /etc/ssl/certs/dhparam.pem 2048
This will generate a 2048-bit group. It may take a few minutes but when it's done you will have a DH group file in the location specified.
The next step is configuring your SSL/TSL, this post will be out sometime this week!