My Dissertation - Week 6 & 7

This sprint has been the beginning of my front-end work. Originally I had planned to do all of my designs stage-by-stage, starting with some hand-drawn designs, then Photoshop wireframes and finally actually coding the design. I ended up taking a slightly different route.. I felt like I needed this whole process page-by-page.
UX Design
I started the design of each page with hand-drawn designs, then built a Photoshop wire-frame and followed up with creating the actual page in HTML and SCSS. I did this because I felt like I had to actually implement each page before starting the next and I feel like it helped a lot with adjusting the designs of each subsequent page.
Landing page
The only real requirement for this page was to take text-input and then send it to the server, wait for a response and then pass the user to the itinerary page.
The mock-up reflects the simplicity of the requirements:
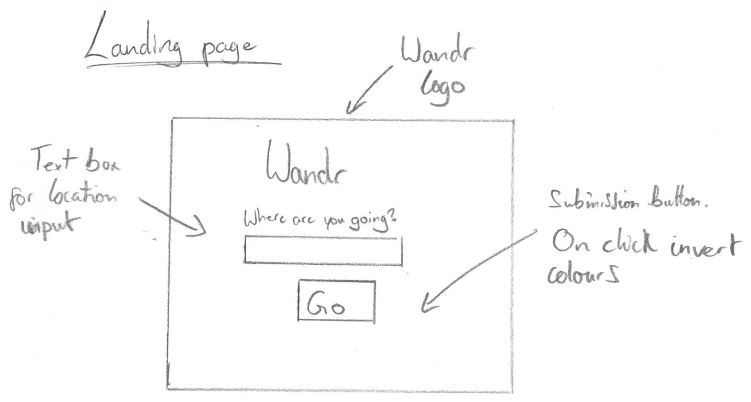
As you can see there's not much on the page, it's very simple. The only things added to it are the auto-complete feature on the text-input and changing the button once you've sent the location to the server, to invert the button colours and add an animation over the button. Here's the Photoshop version:

After adding colours and defining some of the UI options more clearly, I felt ready to implement the page. Finally we ended up with this:
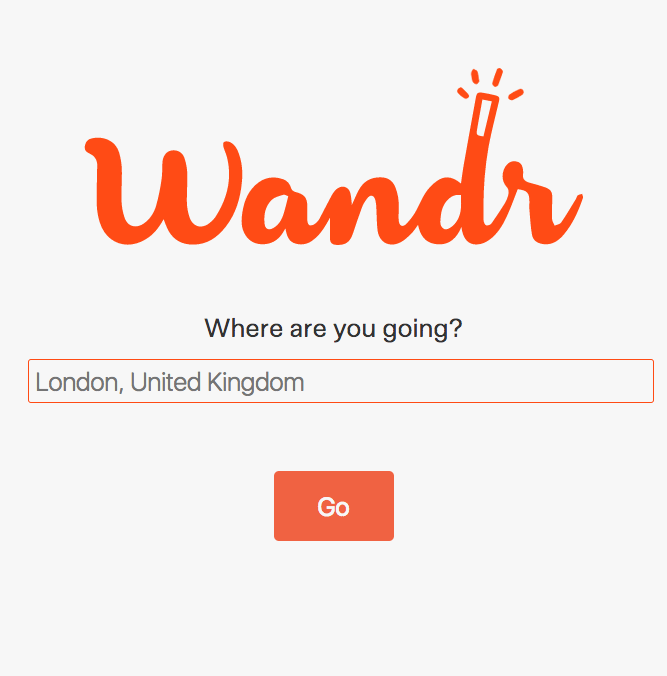
The only major differences between the wireframe and the actual page are element-state styles. For instance the glow on the input when it is the focus, or changing the colour of the button when you hover over it.
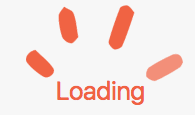
As talked about in the initial sketches for this page, there is also a loading animation and colour inversion when the 'Go' button is clicked. In the screenshot below we can just catch the final tick of the animation loading in.
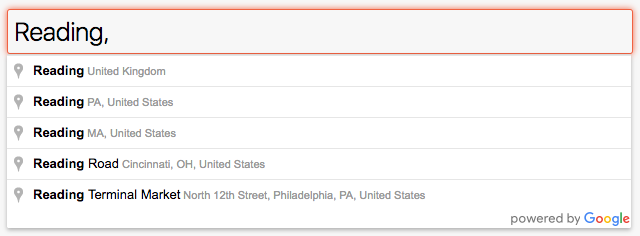
The search autocomplete was also successfully implemented using a Google Maps API, unfortunately the API key is visible in the client-side JavaScript and I'm not sure how I can solve this issue.
Itinerary page
This page has a number of requirements because it deals with the actual itinerary and displaying all the information contained in it, to the user. This page must:
- Display itinerary items and provide controls to manipulate these items
- Display travel information
- Provide controls to export and rename the itinerary
So with these requirements in mind I came up with an initial sketch:
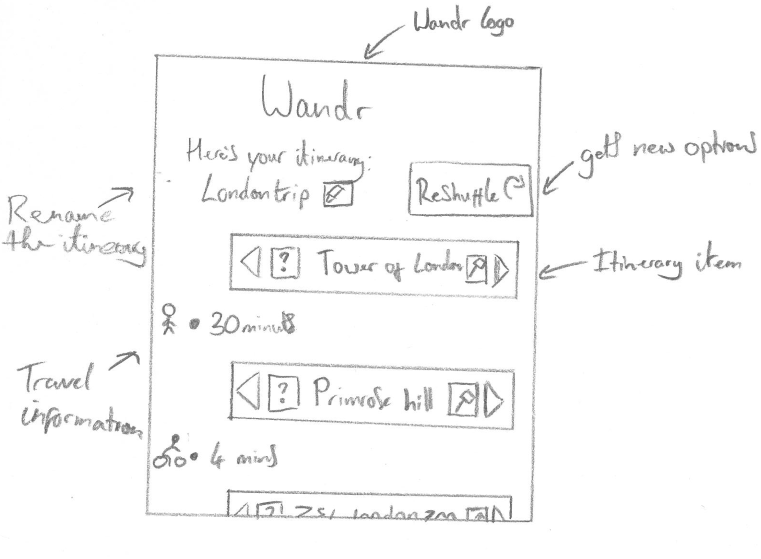
I then thought about how I could bring this to life as an actual page when creating the wireframe and decided that the UI for the travel information would involve not just some complex CSS but also some JavaScript. So I changed the UI for travel information to be more streamline and require less heavy-lifting by the client. This is the wireframe that I made:
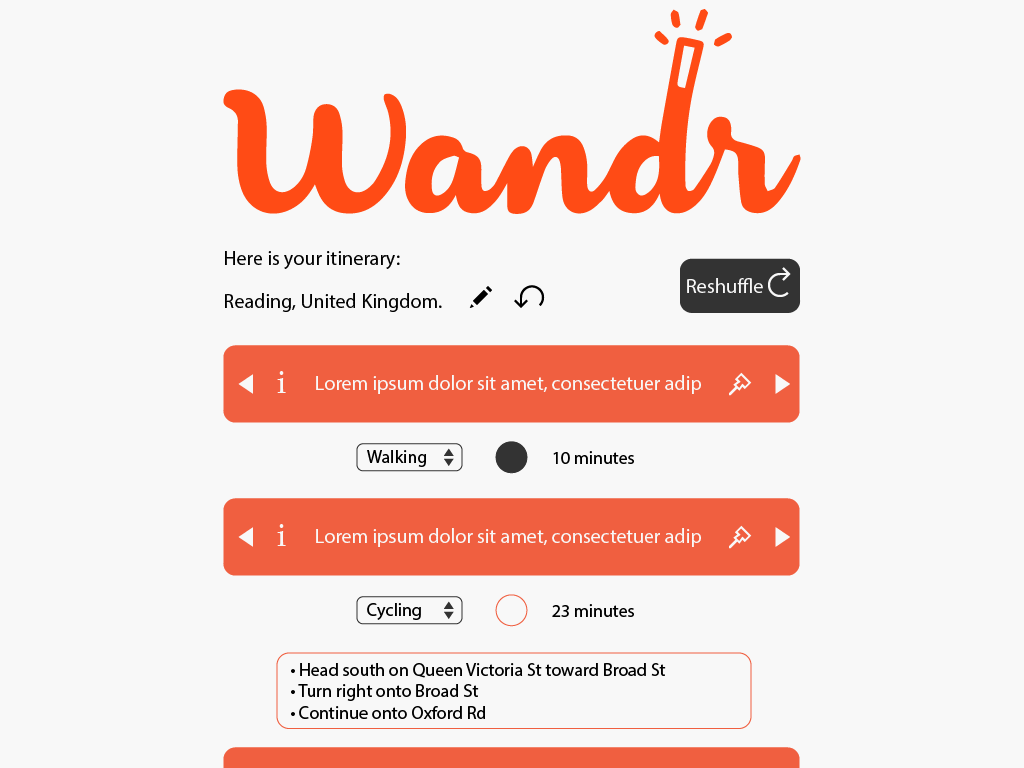
As you can see it's very similar to the initial sketch, the only difference being that the travel information is now underneath the itinerary item. Users can select the mode of transport using a dropdown menu which will then update the journey time value. I liked the idea of clicking the node to show/hide instructions and so I kept that idea. The rendered page looked like this (at the time of writing!):

After bringing the design to actual code and padding out elements so that they were the same as the previous page it came together quite nicely. In this time I also designed an icon for the genre selector in each itinerary item.
Venue information page
The venue info page is almost an extension of the itinerary page, it provides venue-specific details for the user to better choose items for their itinerary. It has a number of basic requirements such as:
- Name of venue
- Venue website
- Venue genre tags
- Venue address and phone number
- User ratings
- Opening times
There will also be some less stringent requirements, where possible we will also display social media accounts and use glyph icons to denote if the venue accepts credit cards, has free wi-fi etc.
With all of these requirements in mind, I set about an initial sketch:
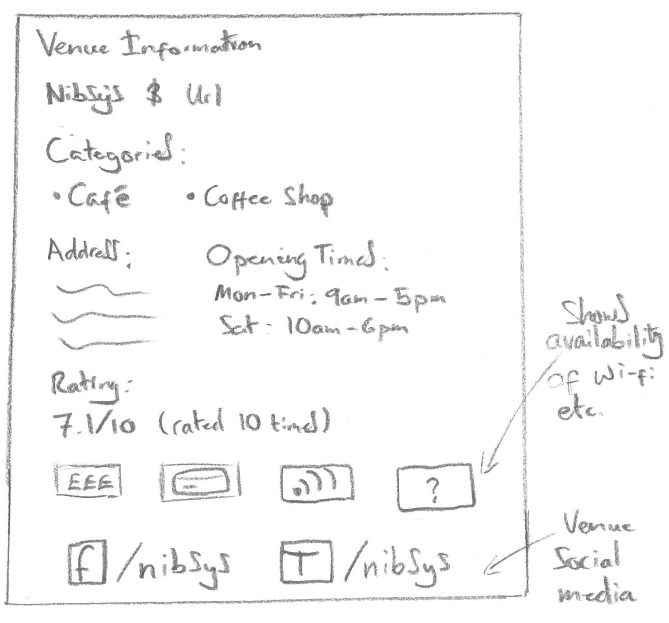
The first thing that I noticed after I'd finished the sketch was that there wasn't a lot of content to the page. This is one of the things that affected my decision to have this 'page' act as something of an extension of the itinerary page. I then started to think about how it could be brought to HTML and CSS and created this wireframe:
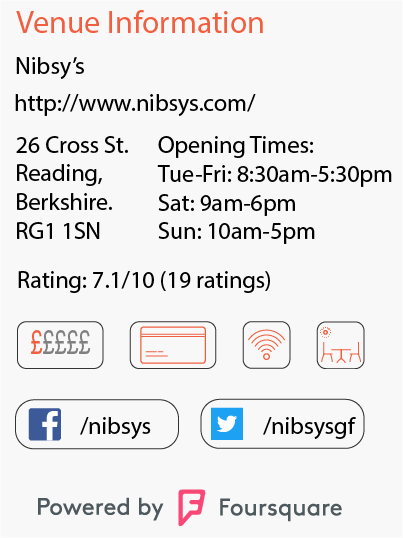
Adding some colour and enforcing some basic structure to the page was helpful in seeing that maybe it still had a little development to go before it was ready to be 'finished'. So I started writing the code for the page and ended up with a few changes:
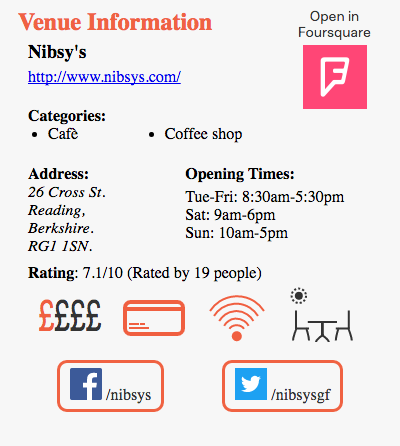
Adding headings to all information was something that I had missed in the preliminary designs, but thankfully I picked up on it. Using some semantic markup for elements where possible was a nice touch I feel, making the web-app just a little more accessible to those with screen-readers.
I also had to rethink the Foursquare attribution, after checking their terms and conditions it is stated that where possible developers should link to the Foursquare venue page when we use their information.
This is all of my design work on the front-end so far, I am hoping to create some additional wireframes to show the smaller details of each page.