SAPUI5 Tutorial - Fragments


Webforms with fragments
In this post we will be using fragments to create a webform that allows the user to easily view and edit the information in the form.
Fragments are just like partials if you are familiar with Ruby, they are constituent parts of a view. That is to say that they are a tiny part of a view, that can be re-used. For instance if you had one element that appears on every page no matter what e.g. navbar, then you could put all of the relevant code for the navbar into a fragment and then import that fragment on every page.
In this tutorial we will build a webform and then create two fragment files that will allow us to view and edit the form information, respectively.
Step 1: Building the form
As we did in our first tutorial, we create a new project from template, the template of SAPUI5 application. Now we're going to edit our view to show us some basic form information, delete everything in your view file and paste the code below:
<mvc:View
	height="100%"
	controllerName="webform.controller.View1"
	xmlns:f="sap.ui.layout.form"
	xmlns:mvc="sap.ui.core.mvc"
	xmlns="sap.m">
	<Page
		id="page"
		showHeader="false">
		<VBox
			class="sapUiSmallMargin">
			<f:SimpleForm editable="false" layout="ResponsiveGridLayout" title="Address" labelSpanXL="3" labelSpanL="3"
				labelSpanM="3" labelSpanS="12" adjustLabelSpan="false" emptySpanXL="4" emptySpanL="4" emptySpanM="4" emptySpanS="0" columnsXL="1"
				columnsL="1" columnsM="1" singleContainerFullSize="false">
    			<f:content>
    				<Label text="{i18n>form_name}"/>
    				<Text text="{Name}"/>
    				<Label text="{i18n>form_role}, {i18n>form_team}"/>
    				<Text text="{Role}, {Team}"/>
    				<Label text="{i18n>form_joinedat}"/>
    				<Text text="{Joined At}"/>
    				<Label text="{i18n>form_country}"/>
    				<Text text="{Country}"/>
    				<Label text="{i18n>form_base}"/>
    				<Text text="{Base Location}"/>
    				<Label text="{i18n>form_url}"/>
    				<Text text="{URL}"/>
    				<Label text="{i18n>form_twitter}"/>
    				<Text text="{Twitter}"/>
    			</f:content>
    		</f:SimpleForm>
		</VBox>
	</Page>
</mvc:View>
Now if you run the project you should see something very similar to the screenshot below:
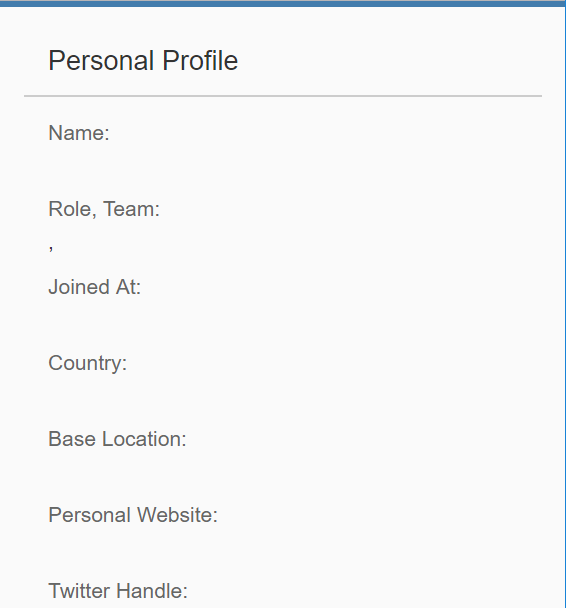
Note:In this post the examples will be using i18n variables for form labels. You must either create the labels in i18n yourself or remove the reference and type your own labels to make text appear in labels! If you want to use i18n labels, read the next section. Otherwise skip it!
Extra step: i18n labels
Go into your i18n.properties file and add the variables for each of the form labels, I pre-fixed all of my labels with form_ and then the label name. e.g. form_name.
You can then invoke these variables in your view like so: {i18n>form_name}. You use the i18n model and then you pull the variable from it, in this example we're pulling the form_name variable, from the i18n model. You should do this for all of your labels!
Step 2: JSON model for our data
You may have noticed that in the various form inputs I used some variable references to nothing, that's because we're going to use a JSON model for our form data. We can use a JSON model to store the information we enter and to display it.
Create a new json file in your models folder and call it whatever you would like, it will store the data for your form. In my case it's going to be some information about your job such as your role, team and base location.
Now that you've created your JSON, populate it with some key-value pairs that you want to use in your webform, here's my JSON:
{
	"PeopleCollection": [
		{
			"Name": "Leon Hassan",
			"Role": "Applications Consultant",
			"Team": "SAP",
			"Joined At": "2017/06",
			"Base Location": "Woking",
			"Country": "United Kingdom",
			"URL": "http://leonhassan.co.uk/",
			"Twitter": "/Consulting_LH"
		}
	]
}
Now that we've got our JSON model, we need to hook it up to our application. This means editing our controller!
Linking our JSON model to the controller
Open your application controller and it will be awfully plain, looking something like this:
sap.ui.define([
	"sap/ui/core/mvc/Controller"
], function(Controller) {
	"use strict";

	return Controller.extend("webform.controller.View1", {

	});
});
What we're going to do now, is write a controller that will take our JSON model and bind it to our application. The first step to achieving this is adding the namespaces we need to our UI definition. So where we had 'sap/ui/core/mvc/Controller' we will add the following items:
'jquery.sap.global''sap/ui/core/Fragment''sap/ui/model/json/JSONModel'
You must then bring each of these namespaces to our controller instantiater, that's the opening function. Where previously we only had Controller as a parameter, we will now add each of the following to the function as parameters:
- jQuery
- Fragment
- JSONModel
Note: We won't be using all of them right now, in fact we'll only be using the JSONModel.. But soon we're going to need our fragment and jquery!
Now that we've added our namespaces we can get to writing our controller. We're going to be a little more neat than what we start with, so you can delete the whole return statement in our last code example and we will write a new controller:
var PageController = Controller.extend("webform.controller.View1", {
	onInit: function (oEvent) {

		//module path follows the same format as other SAP imports, project_name.folder... until we get to our model e.g. data.json
		var oModel = new JSONModel(jQuery.sap.getModulePath("webform.model", "/data.json"));
		//once we've created the model in the application, we set this to the view and then bind an element of the model to the current view.
		this.getView().setModel(oModel);
		//PeopleCollection is the top-level element in my JSON model, it is an array of elements which is why I am binding the first element in the array to the page
		this.getView().bindElement("/PeopleCollection/0");
	}
});

return PageController;
Note: Binding the model to the view means that we don't need to prefix the model's variables with the model name, it is our default model. You can of course set it up as a named model, which will be covered at a later tutorial.
Step 3: Displaying our model data
Now that the model is linked with the application, we want to use the data in our form.
Note: For those using i18n labels, this is where we need to back into our i18n.properties file and update/add our labels. If you're using my JSON model then you will want to add the following variables to your file:
form_name=Name
form_role=Role
form_team=Team
form_joinedat=Joined At
form_country=Country
form_base=Base Location
form_url=Personal Website
form_twitter=Twitter Handle
To invoke a variable from your JSON model, it's as simple as wrapping the variable name in curly braces and because the controller bound the model to our view, there's no need to prefix it with the model:
<f:content>
	<Label text="{i18n>form_name}"/>
	<Text text="{Name}"/>
	<Label text="{i18n>form_role}, {i18n>form_team}"/>
	<Text text="{Role} {Team}"/>
	<Label text="{i18n>form_joinedat}"/>
	<Text text="{Joined At}"/>
	<Label text="{i18n>form_country}"/>
	<Text text="{Country}"/>
	<Label text="{i18n>form_base}"/>
	<Text text="{Base Location}"/>
	<Label text="{i18n>form_url}"/>
	<Text text="{URL}"/>
	<Label text="{i18n>form_twitter}"/>
	<Text text="{Twitter}"/>
</f:content>
Now if you run your application, you should get something that looks like this:

Now we should have a basic view of our filled in webfor, well done!
Step 4: Fragments!
Firstly we will paste the VBox and it's contents from our view file and put it into a new file, this new file will be called Display.fragment.xml and should be created in our View folder.
Note: All types of view files, should reside within the view folder. All fragment files will end with .fragment.xml.
To build a fragment file, we add this as the first tag for the page:
<core:FragmentDefinition
	xmlns="sap.m"
	xmlns:l="sap.ui.layout"
	xmlns:f="sap.ui.layout.form"
	xmlns:core="sap.ui.core">

<!-- here goes the content! -->

</core:FragmentDefinition>
Display fragment
All the data we built into our view file (the whole VBox!), should now be pasted into fragment. You should end up with a fragment file that looks like this:
<core:FragmentDefinition
	xmlns="sap.m"
	xmlns:l="sap.ui.layout"
	xmlns:f="sap.ui.layout.form"
	xmlns:core="sap.ui.core">
	<VBox
		class="sapUiSmallMargin">
		<f:SimpleForm editable="false" layout="ResponsiveGridLayout" title="Personal Profile" labelSpanXL="3" labelSpanL="3"
			labelSpanM="3" labelSpanS="12" adjustLabelSpan="false" emptySpanXL="4" emptySpanL="4" emptySpanM="4" emptySpanS="0" columnsXL="1"
			columnsL="1" columnsM="1" singleContainerFullSize="false">
			<f:content>
				<Label text="{i18n>form_name}"/>
				<Text text="{Name}"/>
				<Label text="{i18n>form_role}, {i18n>form_team}"/>
				<Text text="{Role} {Team}"/>
				<Label text="{i18n>form_joinedat}"/>
				<Text text="{Joined At}"/>
				<Label text="{i18n>form_country}"/>
				<Text text="{Country}"/>
				<Label text="{i18n>form_base}"/>
				<Text text="{Base Location}"/>
				<Label text="{i18n>form_url}"/>
				<Text text="{URL}"/>
				<Label text="{i18n>form_twitter}"/>
				<Text text="{Twitter}"/>
			</f:content>
		</f:SimpleForm>
	</VBox>
</core:FragmentDefinition>
Now if you run your application, it should be pretty much entirely blank. To load our fragment and have our application in the same state it was, we need to adjust our controller.
Controller updates
To do load our fragment when the application is started, we need to add 3 new functions to the controller:
_formFragments: {},

_getFormFragment: function (sFragmentName) {
	var oFormFragment = this._formFragments[sFragmentName];

	if (oFormFragment) {
		return oFormFragment;
	}

	oFormFragment = sap.ui.xmlfragment(this.getView().getId(), "webform.view." + sFragmentName);

	var myFragment = (this._formFragments[sFragmentName] = oFormFragment);
	return myFragment;
},

_showFormFragment : function (sFragmentName) {
	var oPage = this.getView().byId("page");

	oPage.removeAllContent();
	oPage.insertContent(this._getFormFragment(sFragmentName));
}
Note: Don't forget to update the project name references!
Now that we've added our functions for displaying fragments in the page, we need to show a fragment on page-load as default. To do this we add this._showFormFragment("Display"); to our controller instantiation, after binding a specific element to our view. Your controller's onInit function should now look like this:
var PageController = Controller.extend("webform.controller.View1", {
	onInit: function (oEvent) {

		var oModel = new JSONModel(jQuery.sap.getModulePath("webform.model", "/data.json"));
		this.getView().setModel(oModel);

		this.getView().bindElement("/PeopleCollection/0");

		// load some content, like our display fragment (case sensitive)
		this._showFormFragment("Display");
	}
});
Note: Don't forget to update the model reference when binding data to the view.
Now if you run the application you should see your form, as it was before we started to add fragments!
Second fragment
Now we need to create a second fragment (mine is called Edit.fragment.xml) and paste in pretty much the same as our first fragment, but instead of text we want inputs:
<core:FragmentDefinition
	xmlns="sap.m"
	xmlns:l="sap.ui.layout"
	xmlns:f="sap.ui.layout.form"
	xmlns:core="sap.ui.core">
	<VBox
		class="sapUiSmallMargin">
		<f:SimpleForm editable="false" layout="ResponsiveGridLayout" title="Personal Profile" labelSpanXL="3" labelSpanL="3"
			labelSpanM="3" labelSpanS="12" adjustLabelSpan="false" emptySpanXL="4" emptySpanL="4" emptySpanM="4" emptySpanS="0" columnsXL="1"
			columnsL="1" columnsM="1" singleContainerFullSize="false">
			<f:content>
				<Label text="{i18n>form_name}"/>
				<Input value="{Name}"/>
				<Label text="{i18n>form_role}, {i18n>form_team}"/>
				<Input value="{Role}, {Team}"/>
				<Label text="{i18n>form_joinedat}"/>
				<Input value="{Joined At}"/>
				<Label text="{i18n>form_country}"/>
				<Input value="{Country}"/>
				<Label text="{i18n>form_base}"/>
				<Input value="{Base Location}"/>
				<Label text="{i18n>form_url}"/>
				<Input value="{URL}"/>
				<Label text="{i18n>form_twitter}"/>
				<Input value="{Twitter}"/>
			</f:content>
		</f:SimpleForm>
	</VBox>
</core:FragmentDefinition>
You can check to see if you've done it right, by going into the controller and changing this._showFormFragment("Display"); to the name of your second fragment, e.g. my second fragment is called Edit and so this line now reads: this._showFormFragment("Edit");.
Fragment swap controls
Now that we have both of our fragments ready, we need to add some controls to the page to swap between them and also to save changes we make to the form.
Additional controls to the view
The controls for changing which fragment we view will need to be accessible on this view no matter what, so we won't use another fragment for this because it means loading an additional fragment when it should just be a part of the base-page.
Paste the following into your view file, in the page tag:
<footer>
	<Bar>
		<contentRight>
			<Button id="edit" text="Edit" press="handleEditPress"/>
			<Button id="save" text="Save" type="Emphasized" visible="false" press="handleSavePress"/>
			<Button id="cancel" text="Cancel" visible="false" press="handleCancelPress"/>
		</contentRight>
	</Bar>
</footer>
If you run your application now you should have a thin blue-bar across the bottom of your application with an edit button, it won't do anything yet.. That's the next step!

Adding functionality to the controls
Now that we have our controls in the view, we need to make them actually do something! In the Controller we will be adding the following new functions:
onExit : function () {
	for(var sPropertyName in this._formFragments) {
		if(!this._formFragments.hasOwnProperty(sPropertyName)) {
			return;
		}

		this._formFragments[sPropertyName].destroy();
		this._formFragments[sPropertyName] = null;
	}
},

handleEditPress : function () {
	//Clone the data
	this._oPerson = jQuery.extend({}, this.getView().getModel().getData().PeopleCollection[0]);
	this._toggleButtonsAndView(true);
},

handleCancelPress : function () {
	//Restore the data
	var oModel = this.getView().getModel();
	var oData = oModel.getData();

	oData.PeopleCollection[0] = this._oPerson;

	oModel.setData(oData);
	this._toggleButtonsAndView(false);
},

handleSavePress : function () {
	this._toggleButtonsAndView(false);
},
_toggleButtonsAndView : function (bEdit) {
	var oView = this.getView();

	// Show the appropriate action buttons
	oView.byId("edit").setVisible(!bEdit);
	oView.byId("save").setVisible(bEdit);
	oView.byId("cancel").setVisible(bEdit);

	// Set the right form type
	this._showFormFragment(bEdit ? "Edit" : "Display");
}
Note: Please rename all instances of PeopleCollection to your model.
Note 2: The final line in _toggleButtonsAndView should be whatever your fragments are named.
These functions will handle pretty much everything to do with the controls, including whether or not to update our JSON model.
If you run your application now, then you should have a fully functioning webform that loads/saves input. Congratulations!
Well done, I'll be back with more tutorials soon.